
Building a Distributed Machine Learning Testbench with resin.io on Raspberry Pis
25 May 2016 • 8 min. readGuest post for resin.io about my senior design project, originally published here!
Intro
For our senior design project, we decided to build a testbench for developing and iterating distributed machine learning algorithms of the sort that our adviser studies. The general idea is to deliver a complete solution based on a python library which hides away lower-level concepts such as networking and synchronization, allowing an academic programmer to focus on the high-level math of their algorithms.
My teammate Nikhil worked on some high-level algorithm implementations while I worked on the library and tooling. In this post I’ll be explaining how I used resin.io (nominally an Internet of Things platform) and open source tools to take the pain out of my own development process as I built out the library and cluster.
Hardware Setup
The initial plan was to scrounge up the handful of Pis we had around the lab and see what we could do, but the kind folks at resin.io (seriously the best) gifted us a bunch of Raspberry Pi 1 B+s. These are an older model so each device isn’t particularly powerful, but by sheer number they’re rather impressive.
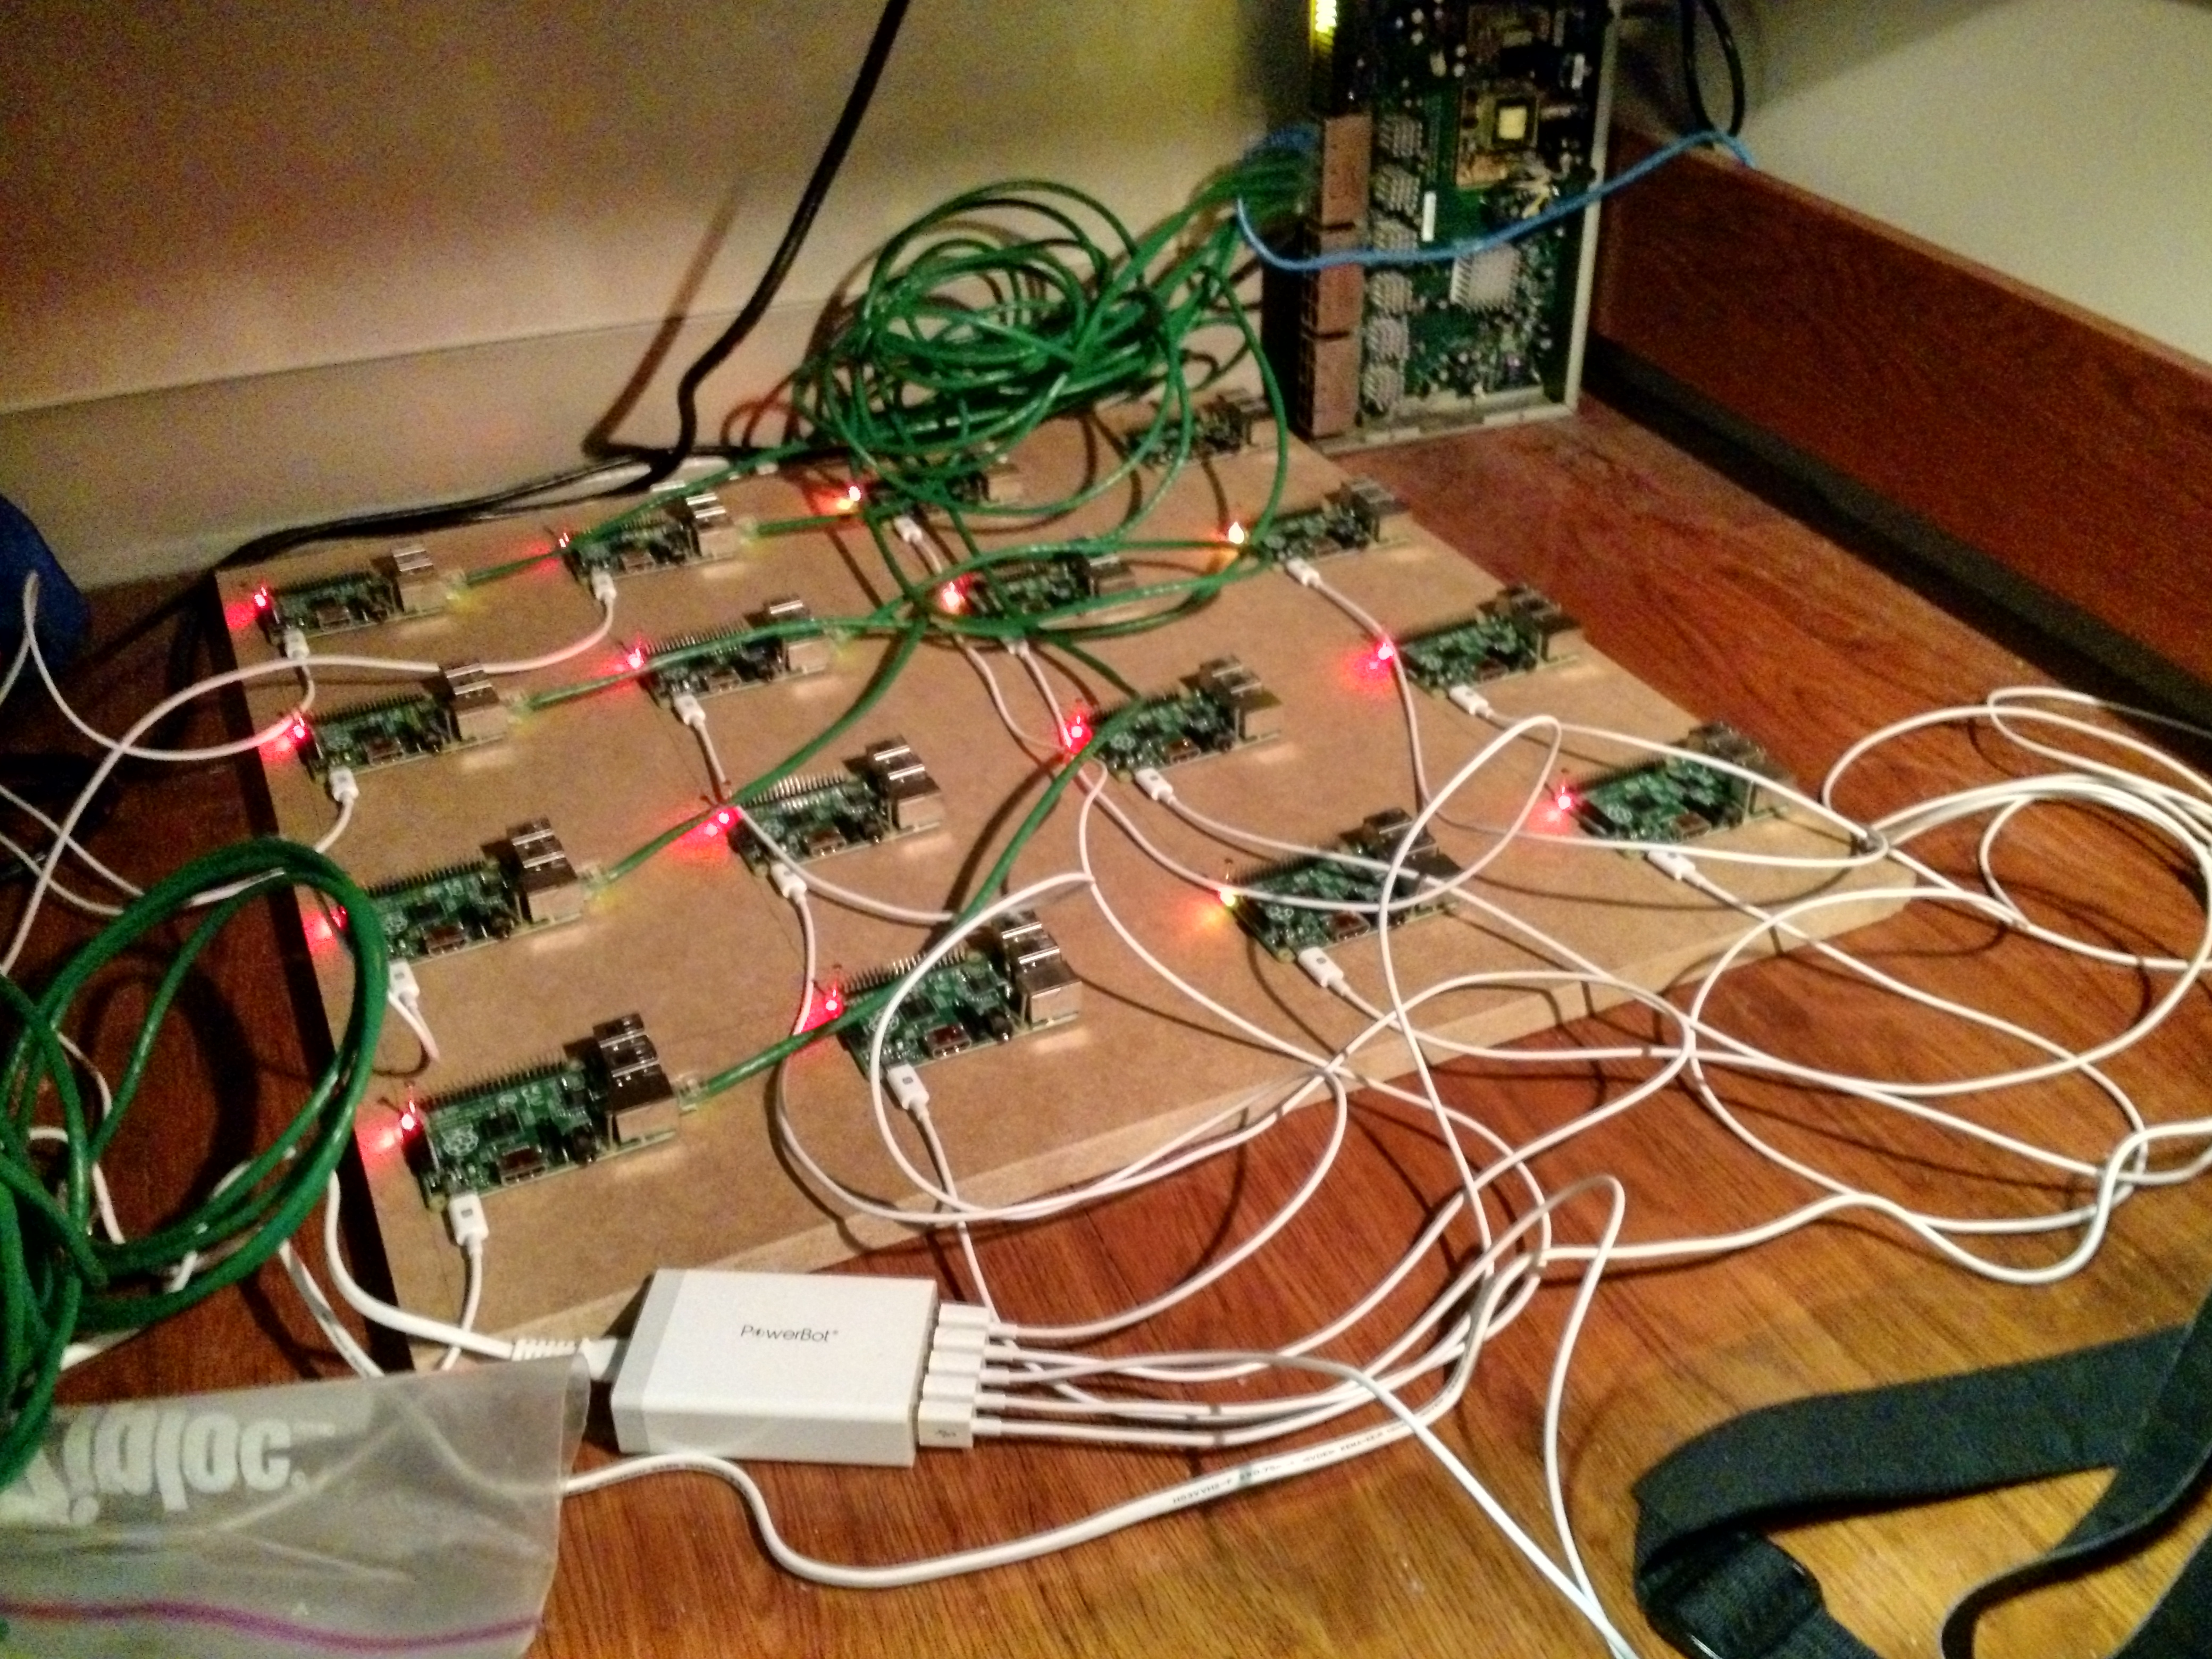
I built a 4x4 grid of Pis (shown partially wired here). Amortizing the cost of the microSD, chargers, cables, and switch, each Pi required approximately $15 of additional hardware.
I kept the Pis in place by nailing them into a thick piece of Medium-density Fiberboard; two nails at slight angles through the holes in the circuit board worked fine. Those holes are machine screw size 2.5M, but I couldn’t find any of those at the hardware store.
The cables were whatever was cheapest on Monoprice, the chargers from Amazon, and the microSD from a lucky $4 for 16GB sale at Staples. The 24 port switch I salvaged from our lab, but the fan was whiny so I opened the case up for passive cooling instead.
Software Setup
Imaging the Pis with the resin.io image ended up being one of the most time consuming parts of this project, only because it required constant babysitting. Three of the twenty microSD cards turned out to be defective, refusing to write (buy extras!), but one by one the 16 working devices showed up on the resin.io console as they powered on. It sure made me appreciate the time savings of not having to reimage every device to deploy new code!
Before finding resin.io, I had tried rolling my own deployment solution, which was complicated by our campus internet hiding the devices from the outside world (and parts of our LAN!). I was working on some weird reverse ssh tunneling scheme where each device would connect to an external server, but keeping the connection alive was a pain and the stock raspbian image unnecessarily bloated for this use case. After switching to resin.io, though, everything just worked! The cluster running in my dorm room was even accessible off campus through the resin.io dashboard.
The dashboard assigns each new device a random unique name.
For the purposes of this project, I had to go through the steps of renaming each corresponding to its position, yielding pi1 through pi16.
Then, I used the environment variable panel to define a variable on each device, $DEVICE_ID, holding the same number.
This way, the same code could be deployed to each device, and specific devices can behave differently depending on their ID.
The Dockerfile is rather straightforward, pulling the resin.io supplied python base image and install the required packages.
It then copies over the repository, and installs the Zookeeper config.
Note that (presumably due to ARM) pip seemed to be compiling numpy from source, causing the whole process to take about half an hour (but thankfully Docker caches at each step so the image is rarely built from scratch).
FROM resin/raspberrypi-python:3.4
ENV INITSYSTEM on

RUN apt-get update && apt-get upgrade -y
RUN apt-get install -y zookeeperd
RUN apt-get install -y libzmq3-dev

RUN pip install -vv numpy # this takes an hour to run!
RUN pip install kazoo
RUN pip install pyzmq
RUN pip install requests

COPY . /app
COPY zoo.cfg /etc/zookeeper/conf/zoo.cfg

WORKDIR /app

CMD ["./init.sh"]
init.sh is a runtime script which configures Zookeeper with the device ID (and forcibly restarts it), then runs a demo:
#!/bin/sh
echo "Boot complete."
echo "I am device #$DEVICE_ID"

echo "Launching Zookeeper"
service zookeeper stop
echo $DEVICE_ID > /var/lib/zookeeper/myid
service zookeeper start

echo "Starting routing demo"
python3 /app/geo_routing.py
System Design
Each device runs an Apache Zookeeper instance in an overly replicated cluster (this admittedly made more sense when I was working with three devices – I’d consider moving the Zookeeper instance off the cluster to a coordinator server now). On boot, each device checks in to Zookeeper with its ID:IP mapping, and waits for the rest of the nodes to come online.
The networking aspect of the library is mostly handled by pyzmq, a lightweight message queue.
I wrote a class that wraps all the networking and marshaling by opening sockets with all the other devices, offering an interface for sending arbitrary python objects to a neighbor (identified by name, rather than by IP).
The class also tries to simplify synchronization, by providing a function that sleeps the calling thread until the device has received a message from each neighbor, which is a common operation in synchronous algorithms which advance through phases together.
It all works quite well – for the most part. As it turns out, trying to obfuscate all synchronization primitives lead to some interesting struggles with the tornado event looper, causing some pretty dense deadlocks. I still haven’t figured out the cause of one nasty race condition that only surfaces once in a hundred calls. Whoops…
Configurable Topologies
One interesting feature is the ability to dynamically change the “wiring” of the cluster by defining which nodes are “neighbors” to which – the networking wrapper will restrict communication to only a device’s neighbors. I wrote a couple of quick and dirty web interfaces for generating a topology JSON configuration which each device fetches from a server: on the left is a “wired” simulation where clicking between two devices links them, and on the right is a “wireless” simulation where the draggable nodes are connected if they are within signal range.
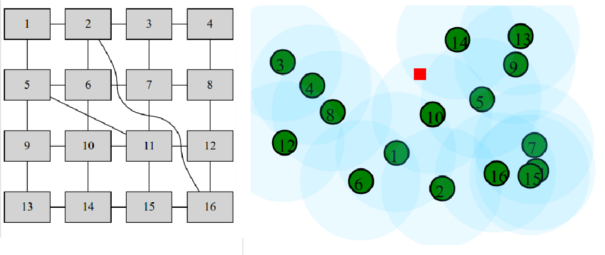
This is served on an outside DigitalOcean droplet, but as I discovered too late resin.io allows for public facing device URLs so it should be possible to serve these UIs directly on the cluster.
Local development
While resin.io made deployments a whole lot easier, I still needed a more practical solution for local development than waiting a full three minutes to realize a python script had a syntax error. Manually opening terminals on my laptop was a hassle and made cleanup hard.
Tmuxinator fit the bill nicely, offering a wrapper on tmux allowing for launching configurable sessions.
name: c6
root: .

pre:
  - echo "rmr /addr" | zkCli.sh
  - ln -sf c6.json topo.json

pre_window: source env/bin/activate

windows:
  - nodes:
      layout: tile
      panes:
        - DEVICE_ID=1 python3 <%= @args[0] %>
        - DEVICE_ID=2 python3 <%= @args[0] %>
        - DEVICE_ID=3 python3 <%= @args[0] %>
        - DEVICE_ID=4 python3 <%= @args[0] %>
        - DEVICE_ID=5 python3 <%= @args[0] %>
        - DEVICE_ID=6 python3 <%= @args[0] %>
With this file in the tmuxinator configuration directory, running mux c6 avg_async.py will launch the asynchronous averaging script in six tiled terminals, linked in a circular topology.
Killing all the tmux terminals is just a C-b &.
LED Control
One of the cool advantages of using physical hardware is the ability to visualize the workings of the code. You can override the CPU and disk indicator lights on the Pi, giving you a couple of onboard LEDs, green and red.
def set(led, value):
    command = "echo %d | sudo tee /sys/class/leds/led%d/brightness" % (value, led)
    subprocess.call(command, shell=True)

def init(led):
    command = "echo gpio | sudo tee /sys/class/leds/led%d/trigger" % (led)
    subprocess.call(command, shell=True)
Pass led as 0 for green, 1 for red, and value as 0 for off, 1 for on.
Call init once to disable the default indicator behavior of the lights.
This shone nicely in a “geo-routing” demo I prepared, where one Pi would try to send a message to a non-adjacent Pi by bouncing it between neighbors. By turning on LEDs, one could visualize the path of the message through the grid.
Endgame
We actually couldn’t get the router hooked up at the demo session, but we plugged everything in anyway and pitched as well as we could.
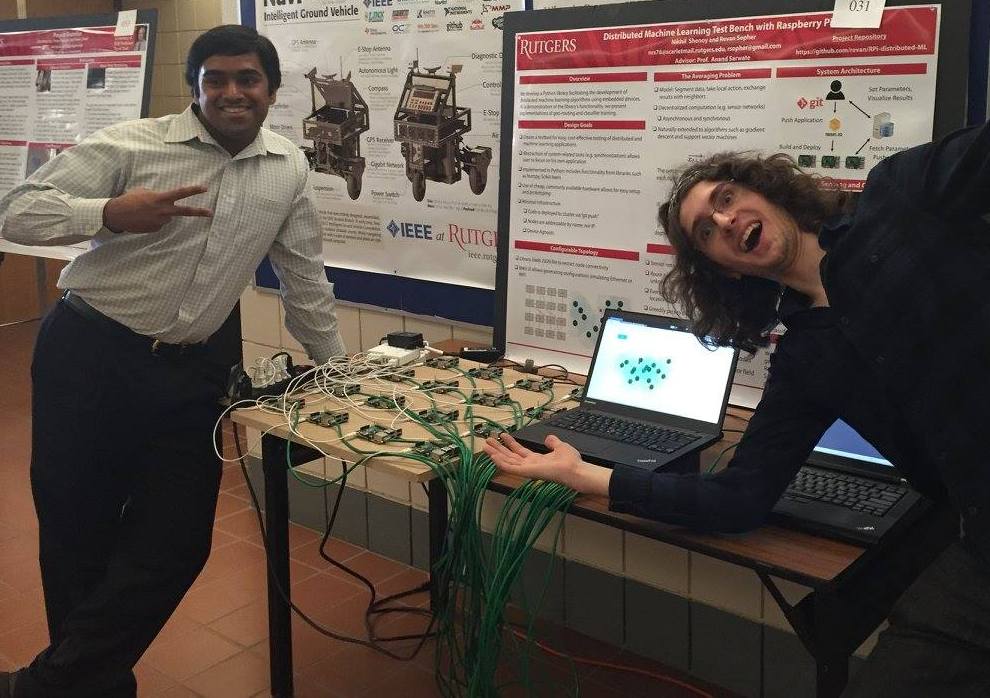
We ended up taking one of the three first place prizes, which was pretty rad. I wouldn’t recommend anyone use my code outright (there will be regrets), but I’m hoping this writeup will inspire someone to give resin.io a shot even in non-IoT projects!
The project source is on GitHub. Give me a star or something. Pretty please?
Questions? Want to tell me my code is bad? Find me at revan.io.